Basically after everything I bake, I say to myself, okay, no more baking, Sam, because really, it’s just not doing anyone any favors. So many (not everyone [hey if you live close to me please come by and get a piece of cake if you so desire], but lots) of my favorite people kind of live far away, and if I’m not baking cookies, well, it’s hard to mail anything else. Which means that I’m basically eating what I make. And my family, who are happy to eat it, but I know it’s not really *healthy* to be constantly making desserts to eat. Subsequently, I force myself to look only at the cooking/savory sections of cookbooks and not think about potential concoctions of flour, cocoa, sugar, and fat du jour.

Hah. So I think all these things. And then I find myself feeling a little cabin-fevery, freezing, bored, unfocused.
Then, what happens?!?!!? I’m preheating an oven to 350˚F and greasing some pans and mixing wet separately from the dry and mashing avocado…
Wait. What?
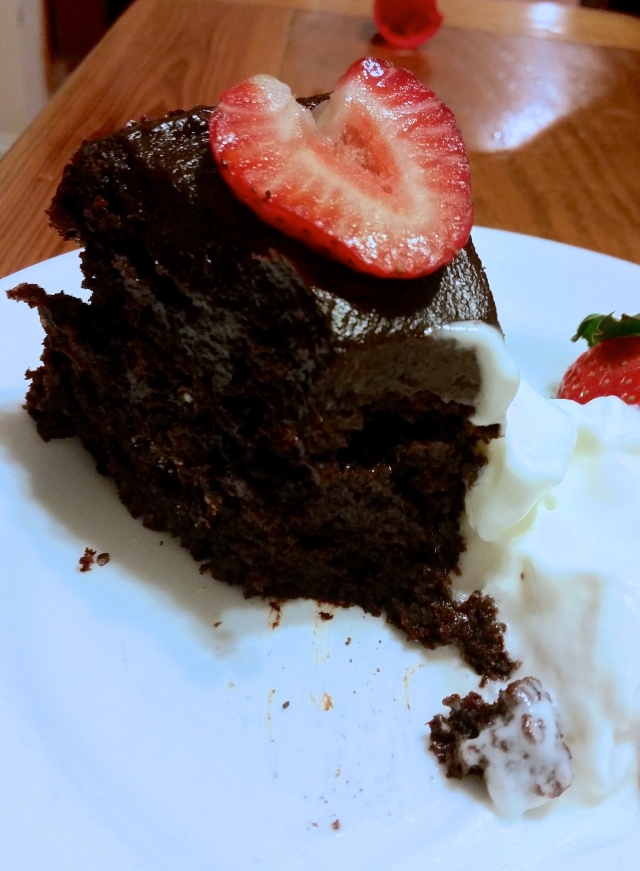
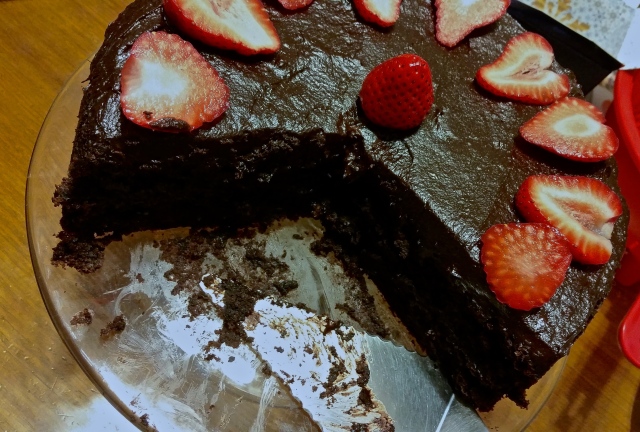
Oh yeah. And I turned it into *THE BEST FREAKING CHOCOLATE CAKE + FROSTING EVER.* Also, it’s whole wheat and vegan, but… you SERIOUSLY would N.E.V.E.R. KNOW! It’s just …
Absolutely the Best Chocolate Cake Ever
Adapted from Avocado Central
Cake:
6 oz high quality dark chocolate (i used a mixture of Baker’s bittersweet chocolate bars, and leftover dark chocolate bars. I’m a dark chocolate fiend. There’s plennnty of sugar to round it all out, don’t worry).
1/4 cup cocoa powder
3 tablespoons water
1 large Hass avocado
2 cups water
1/4 cup vegetable oil
2 teaspoons almond extract
1 teaspoon instant espresso powder
2 tablespoons white vinegar
1 cup granulated sugar-in-the-raw (or whateva sugar)
1 cup packed brown sugar
2 1/2 cups (or 300 g) whole wheat pastry flour (or all purpose)
1/2 cup ground flax seed (original calls for almond meal, but I was too lazy to make some)
2 teaspoons ground cinnamon
1/2 teaspoon salt
2 teaspoons baking powder
2 teaspoons baking soda
Frosting:
Here’s what *I* did, based on what I had on hand. Refer to original recipe for…well, the original recipe.
1.5 Hass avocados
2/3 cup powdered sugar
4 Medjool dates
1 banana
2 small packets of honey (either ‘borrowed’ from Panera, or 2 teaspoons form the jar you bought in honesty)
Several grinds of sea salt or a pinch or two of salt
Lots of cocoa (1/4-1/2 cup, or until it’s chocolatey enough. Original recipe does *not* add enough, for sure.)
1/2 teaspoon almond extract
1/2 teaspoon vanilla extract
1/2 teaspoon instant espresso powder
Strawberries and whipped cream for serving
Directions for cake:
Preheat oven to 350F.
Grease two 9 inch cakepans and dust with cocoa. Seriously. This will give it an amazing crunchy ‘crust’ (wrong word for cake but that’s what it is).
In a glass bowl, combine the chocolate, 4 tbs cocoa powder, and 3 tbs water and set over a pan of simmering water to melt. Stir and melt chocolate until combined and melted.
In a large, high-lidded bowl, add the avocado, 2 cups water, oil, 1 teaspoon espresso powder, the melted chocolate, almond extract, white vinegar, and the sugars. Tip: use an immersion blender to blend it all up, or food processor, or a whisk + strong arm muscles. Get that alllll good and blended.
In a separate, large bowl, mix flour, flaxseed, cinnamon, baking soda, baking powder, salt.
Add wet to dry and mix until just combined; don’t overmix even if there end up being little blobs of unmixed flour here and there. It won’t affect the taste or anything.
Pour evenly into the cake pans (this is where having a kitchen scale reallllly comes in handy) and bake for 45 minutes.
When a knife inserted into the center comes out clean, take out and allow to cool. 10 minutes in the pan, then turn out onto a cake stand + plate (one for each layer) and let cool as long as humanly possible. AKA, like, barely an hour, in my case. In the mean time, do those dishes and whip up some frosting:
Frosting:
In a food processor, add avocado, dates, and banana and mix for a while until as broken down as possible. Then add the rest of the ingredients and adjust to taste.
Put half the frosting on the middle layer, then put the second cake layer on top and frost the top of this. You really don’t need to frost the entire cake; the cake is supremely moist and delicious and you really won’t miss anything. Plus it lets the “crust” stay nice and crispy and delicious.
Decorate with strawberries (I removed the stem, then I cut each in half lengthwise, then again, to make hearts!). Serve with some whipped cream if desired and more strawberries!!

It was actually kind of funny, in a “what a funny coincidence” kind of way. Today, my parents took my brother back to school. I was working on some grad school stuff and then decided to take a study [baking] break as I am wont to do. I made the cake (with only a few minor mishaps, including a little bit of a sea salt explosion and quick thinking of what I could replace almond meal with). I was thinking, how nice would it be to have some strawberries alongside? (chocolate covered strawberries are probably tied for favorite dessert in the world, the other being chocolate lava cake, and the other being strawberry short cake, and other being mint chocolate chip ice cream…) I decided I’d forgo them since we didn’t have any. I had just finished frosting the cake when parents walked through the door, my mom holding a Costco-sized container of strawberries!
Such perfect timing.
Since I’ll be in India for my birthday this year, my mom had been secretly planning to give me some early birthday presents tonight. I had no idea but decided to bake a cake anyway… funny how things work out!
Anyway.
This cake was like, I can’t even describe it, the freaking BOMB. Moist. Delectable. Crunchy, crispy edges, super moist. The frosting was the perfect consistency, and you can’t really taste the espresso but I think it definitely brought out the cocoa-y ness of the chocolate like it is supposed to do. Definitely recommend the strawberries as an accompaniment. You canNOT taste the avocado at all! It’s so, so, so, so, so, so good. I literally outdid myself. I really can’t believe how delicious it came out. Seriously, you’ll never need another cake recipe again. Drooling. Dying. Loving this.
Now I’m watching “Failure to Launch” for like the 27th time (it never gets old for me, one of those movies) and mellowing out the sugar/chocolate rush. Hey, I ran and walked in this bitter icy cold this morning. Chocolate cake is totally my dinner. I’ll go back to writing my lit review tomorrow. 🙂
Other chocolate cake recipes:
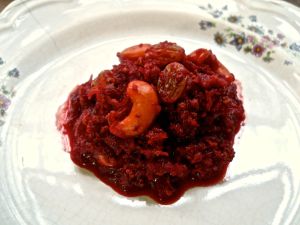
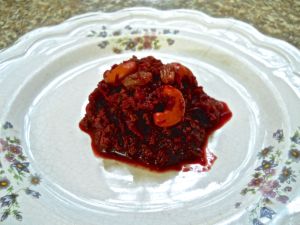
Beet Chocolate Cake (with peanut butter saucy frosting)
German Chocolate Cake (Vegan)
Chocolate Pudding Cake
 I should probably rename my blog, “Sometimes I Cook” because that’s a much, much truer title than my title from my high-school/college yesteryears of “cooking during the breaks” since… well, real life (and not even real-real life, grad-school-real-life, which is not the same as ‘real person’ life) does not really contain ‘breaks’ in which to cook to one’s heart’s content [because I’m either recovering from jet lag; excitedly looking forward to weekends to …catch up on all the work; or enjoying non-Indian food (hello burgers! hello smoked salmon! hello RAW SALAD)]. Which explains the last ~2-3 years.
 Preheat oven to 400 F. Rinse beets and chard. Cut greens off of the beets and set aside. Spray the beets with coconut oil, or rub a little coconut oil/olive oil/butter all over and place cover each with aluminum foil. Bake for 1 hour or longer; remove when tender if pierced by a fork. Allow to cool and then peel (they should peel easily) and chop into slices or rounds. Set aside.